
Your home’s ductwork is a pipeline that leads from your heating and cooling units through your supply ducts to your supply registers. These supply registers provide your rooms with conditioned air and carry air back from your return registers through the return ducts. Leaks anywhere in this system can cause you significant problems, not only with your comfort, as cooled or heated air is lost, but also with your wallet, as your energy costs go up. The air quality in your home can also be affected as pollutants can be drawn into your duct system through leaks and circulated through your home.
The typical home loses 20 percent or more air from its ducts due to leaks. Not only are leaky ducts losing your conditioned air, but your whole system is losing efficiency, by up to 20 percent according to EPA Energy Star product manager Doug Anderson. Furthermore, leaks in the return ducts can allow unsafe air into the system. This polluted air, once drawn into your system, is then circulated throughout your home, potentially causing health issues for you and your family.
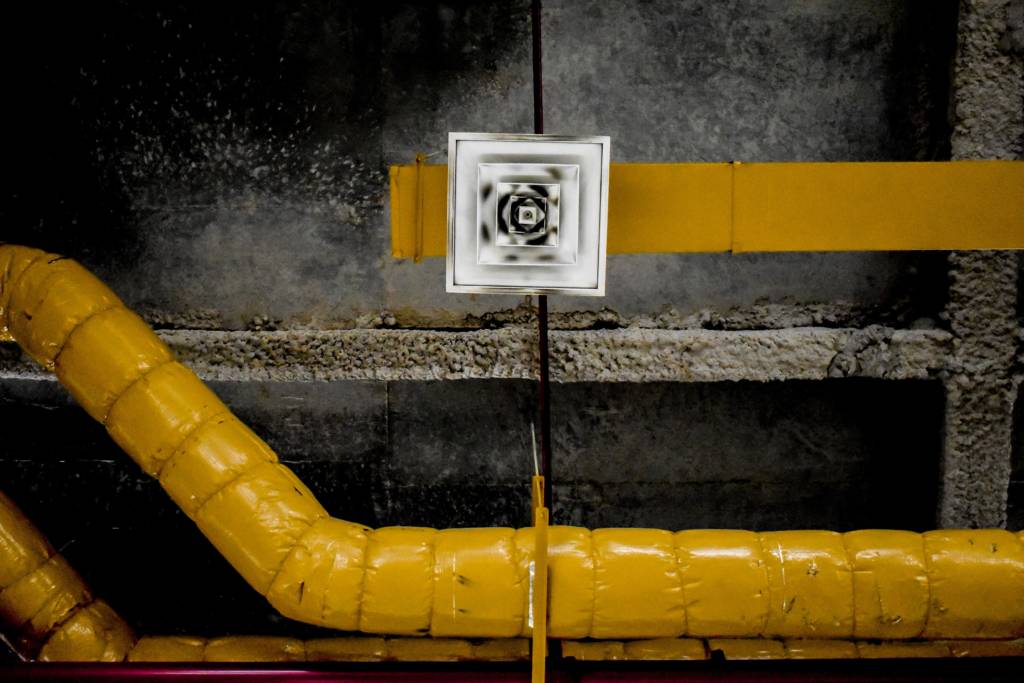
Ductwork often runs through the unconditioned areas of your home, such as your attic, crawlspace, garage, or basement. It can be made of a number of materials. The most common is sheet metal, but some are constructed from fiberglass duct board, and some are flex duct, which may or may not come already insulated. No matter the type of ductwork you have, leaks are a common problem.
Aside from the general statistics, there are a number of clues your home could be giving you that you have leaky ductwork. These include:
- Do you have rooms that don’t heat or cool as well as others?
- Do you have rooms that become dusty when you turn on your air conditioner?
- Have you been having higher energy bills?
Rooms that aren’t heating or cooling well could mean that heated and cooled air just isn’t making it to those rooms due to leaks. A dusty room could mean, as mentioned above, that the return ducts have leaks that are pulling dust, insulation fibers and who knows what else into your home. This can be a serious health hazard. And, of course, higher utility bills are a red flag that your system is working harder than it should be, possibly because it is having to compensate for leaks in your ductwork.
Now let’s talk about insulation. Materials that easily conduct heat, such as sheet metal, will lose between 10 to 30 percent of the energy applied to heating and cooling through their surfaces during temperature extremes when they are located in unconditioned areas. Inadequate insulation costs you in energy and comfort. It may also result in condensation on the surface of your ductwork and consequent problems with moisture, such as mold growth and rusting.
So, how do you as a homeowner address this problem? The EPA recommends that you hire a professional to do the work for you. However, if it is safe to do so, you can seal and insulate your ducts yourself.
What to do Before you Seal and Insulate your Ductwork
As with most big home projects, there are safety issues to consider. Before you start sealing or insulating your ductwork, you should check your home and HVAC system for any problems that you must take care of ahead of time. Look for:
- Structural problems within your home
- Damage to or design problems with the ducts themselves
- Mold, asbestos or other contaminants in your home or ductwork
- Evidence that testing and sealing your ductwork would create health problems for individuals living in your home
- The ability of the ductwork to be safely accessed and worked with
- Any other health or safety issues, such as knob-and-tube wiring, animal or insect infestations, toxic materials, solvents, non-IC rated can light fixtures and so forth
Once you have either determined that there is no impediment to moving forward, or you have had a professional clear any problems you discovered, you can proceed with sealing your ducts. Remember, you must seal your ducts as thoroughly as possible before you insulate them. One possible exception is if you are using preformed insulation sleeves on round ductwork as discussed below.
How to Seal Ductwork
As sheet metal ductwork is the most common, we will concentrate on ductwork made of that, which can be rectangular, round, or both depending on each individual duct’s placement in the system.
The first thing you have to do is find the leaks. There are a couple of ways to do this. You can have a professional come and do a test on your system, or you can do it yourself.
Common areas where leaks occur include:
- At registers and vents where they come into a room
- At joints or connections
You may also find holes, missing pieces, or disconnected ductwork. Sealing the leaks in the unconditioned areas of your home (attics, crawlspaces, garages and basements) is more critical than those in conditioned spaces.
- Start at the heating and cooling units and work your way to the final register in your home. Mark any leaks you find with something you can easily see when you go back to do the sealing. You don’t want to miss any spots. Do this with the system running so you can feel for leaks as you also look for places that have rusted or have become discolored, indicating a possible leak.
Since the pressure on leaks near your units is greater than those farther away, these are most important to discover and seal. Also, there tend to be more leaks in this vicinity.
- Before sealing your ducts, make sure the surfaces to be sealed are clean and dry, especially if you plan to use tape as your sealant.
- Next, seal the leaks with one or more appropriate sealants. Start at your heating and cooling units and work toward the last register, as you did when searching out the leaks. Make sure to seal every hole and seam.
There are a few options to choose from when it comes to which sealant to use. The most commonly used type is mastic. This is a gray paste that can be spread on holes, over gaps and at the joints to seal leaks. However, for wider gaps, over one-eighth inch, you will need mesh, or web, tape in conjunction with the mastic to complete the seal. Mastic is popular because it provides a strong, durable, long-lasting seal. But, it may be better to use tape in places that you will need to access later, such as near the evaporator coil or end cap where you might want to do some cleaning.
To use mastic, which comes in a tub or bucket, spread it with a stiff paint brush or your gloved fingers around or over the area to be sealed. It also comes in caulk tubes for more precise applications. You’ll want to use an even layer about the thickness of a nickel for the best seal. You should wear protective clothing that you can throw out as the mastic is a bit messy. It’s also best to keep the mastic off of your skin.
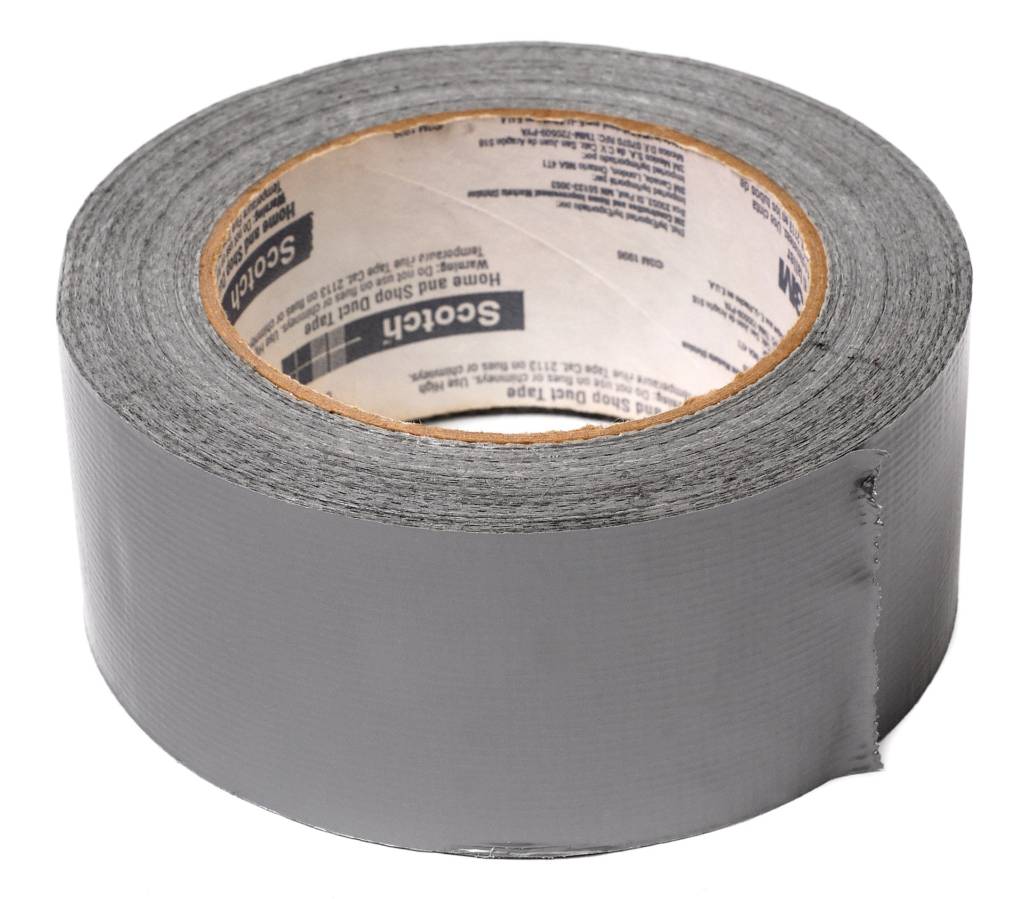
You can also use foil duct tape or butyl duct tape in conjunction with or instead of mastic. Some foil tapes are actually mastic tapes as well. If you choose to use foil tape, choose one with the Underwriters Laboratories (UL) logo on it.
Never use old-fashioned duct tape; it will not hold. If you do use tape, you can increase the seal by adding a layer of mastic over it. Remember, tapes will have a tendency to pull away over time. - Check to make sure you have sealed all the places you marked, including joints, and the connections at vents and registers. You may want to tighten your vents as well to make sure you aren’t losing air between the vent and the floor, ceiling or wall.
- Make sure the mastic has dried before you move on to insulating your ductwork.
Once you have sealed all the leaks you have found in your ductwork, you will need to have a couple of tests done before you move forward with the insulating. The first is an air flow test to make sure your system’s air flow has not been adversely affected by sealing. The second test is a combustion safety test to ensure that the results of combustion, such as gases from gas appliances, are not being pulled into the home through back drafting. Note that various government entities and utility companies will give credits for improving your energy efficiency. So, check into these to help pay for the necessary testing. Your energy savings alone may even cover your expenses.
How to Insulate Ductwork
First, why insulate your ductwork? All that energy loss mentioned above is costing you money. Insulating your ductwork could save you 10 to 30 percent on your energy bills. Additionally, you will be more comfortable because your air will arrive in your rooms closer to the temperature you set as it will not be giving up or gaining excess heat through uninsulated surfaces. As an added bonus, insulation also helps to dampen the noise made by your heating and cooling units, making for a quieter home for you and your family.
How you insulate your ductwork will depend on the type of ductwork you have and the type of insulation you choose. Fiberglass is the most common type of insulation used. It often comes in rolls (wrap, or blanket-style) with a foil backing and is relatively easy to work with. The foil facing serves as a barrier to moisture and helps keep indoor humidity controlled.
There are a few other types of duct insulation available, including one in the form of a layer of polyethylene bubbles between two radiant barriers. Each type has its own benefits and drawbacks. Be sure to do your homework before choosing the best option for you.
The R-value is a measure of how well the insulation resists heat loss or gain from the ductwork you want to insulate. So, insulation with a higher R-value generally works better. Be sure to check all relevant codes when installing new duct insulation to be sure you comply with the required R-values for your state. Note that R-values may be different for different parts of your system, and for different areas of your home.
When working with fiberglass insulation, always use gloves, safety goggles, protective clothing and an appropriate dust mask. Read the manufacturer’s product information before you begin.
To insulate your ductwork using wrap-style, foil-faced fiberglass insulation:
- Measure your ductwork.
- Measure and cut your insulation so there is a small overlap.
- Make sure the fiberglass is facing the ductwork and the foil vapor barrier is facing outward.
- Staple and/or tape the sides of the insulation together using pieces of foil, vapor retarder duct tape.
Take care not to compress the insulation. It could reduce its effectiveness. Do your best to minimize compression at corners and elbows. - Seal the entire seam you’ve just created with your foil, vapor retarder tape.
- Use the tape to seal all sections of insulation together by wrapping the tape all the way around the duct to connect them. Again, be careful you don’t squeeze or compress the insulation, or it may work less efficiently.
Here’s a tip when using tape. Pull off the backing as you go to avoid the tape sticking together.
- Be sure to seal any rips or punctures in the vapor barrier with tape so no moisture can get in.
- If you are installing preformed insulation, disconnect an elbow, place a plastic cap over the end of the duct and slide the insulation over the duct.
- Make sure you seal all of the ductwork joints you had left unsealed in order to install the insulation sleeves with mastic before you seal the sleeve pieces to each other with HVAC metal tape.
So, how much does it cost to insulate your ductwork yourself? To give you an idea, a homeowner in Northwest Florida could insulate about 1,000 square feet of ductwork for between $500 and $600. That includes your materials, supplies and tools. Considering what you’ll be saving in the long run, that’s not too bad.
Now that you know how to seal and insulate your ductwork you can improve the air quality in your home, save energy dollars, and increase the efficiency of your appliances. In fact, a home that has properly sealed and insulated ductwork may need smaller, less expensive heating and cooling units than one without such ductwork. And don’t forget to check into those tax credits.